canon 40d user guide
Canon 40D User Guide: An Overview
This guide details the Canon 40D’s features, from initial setup to advanced techniques, covering shooting modes, focusing, and troubleshooting for optimal performance.
The Canon EOS 40D, released in 2007, represents a significant step for enthusiasts venturing into the world of digital SLR photography. This 10.1-megapixel camera quickly gained popularity due to its robust build quality, advanced features, and excellent image quality.
It bridges the gap between entry-level and professional models, offering a comprehensive set of controls and customization options. The 40D boasts a 3.0-inch LCD screen, a 9-point autofocus system, and continuous shooting at up to 6.5 frames per second.
This user guide aims to unlock the full potential of your Canon 40D, providing clear instructions and helpful tips for photographers of all skill levels.
Key Features and Specifications
The Canon 40D features a 10.1-megapixel APS-C CMOS sensor, delivering detailed and vibrant images. It offers a native ISO range of 100-1600, expandable to 3200, for excellent low-light performance. The camera’s 9-point autofocus system ensures sharp focus on your subjects, while continuous shooting reaches 6.5 fps.
Its 3.0-inch LCD screen provides clear image review, and the robust body construction ensures durability. Key specs include a DIGIC III image processor, compatibility with EF and EF-S lenses, and support for both RAW and JPEG image formats.
The 40D also includes features like Live View shooting and a customizable interface.
Getting Started with Your Canon 40D
Begin your photographic journey with the Canon 40D by unpacking, charging the battery, and inserting a compatible memory card for image storage.
Unboxing and Initial Setup
Carefully unpack your Canon 40D, ensuring all included accessories are present: the camera body, battery, battery charger, power cable, shoulder strap, and various manuals and software CDs. Before first use, inspect the camera for any physical damage.
Insert the battery into the battery compartment, securing it properly. Connect the battery charger to a power outlet and charge the battery fully – this may take several hours. While charging, familiarize yourself with the camera’s exterior, identifying key buttons and dials.
Install the provided software on your computer, if desired, for image transfer and editing. Finally, set the date, time, and your preferred language on the camera before commencing your photographic endeavors.
Battery and Charging
The Canon 40D utilizes a Canon LP-E6 battery. Always use the supplied LC-E6 charger for optimal charging and to prevent damage. A full charge typically takes around 2-4 hours, indicated by a charging lamp on the charger. Avoid overcharging the battery, as it can reduce its lifespan.
Battery life varies depending on usage, but a fully charged battery generally allows for approximately 500 shots. It’s advisable to have a spare battery on hand, especially during extended shooting sessions. Store batteries in a cool, dry place when not in use.
Never disassemble or modify the battery pack. Discard used batteries responsibly, following local regulations for electronic waste disposal.
Inserting Memory Cards
The Canon 40D supports CompactFlash (CF) cards for image storage. Locate the memory card slot on the side of the camera, typically covered by a protective door. Gently insert the CF card into the slot, ensuring it clicks into place. Do not force the card.
To remove the card, press the release button on the card door, and the card will partially eject. Carefully pull the card out. Always handle memory cards with care, avoiding static electricity and physical damage.
Formatting the card within the camera is recommended for optimal performance.

Understanding the Camera Body
Familiarize yourself with the Canon 40D’s layout, including front, rear, and top panel controls, as well as the viewfinder and LCD screen for efficient operation.
Front Panel Controls
The Canon 40D’s front panel houses essential controls for immediate access during shooting. You’ll find the lens release button, crucial for swiftly changing lenses to adapt to various photographic scenarios. Adjacent to this is the depth-of-field preview button, allowing you to visualize the final image’s sharpness.
The autofocus point selection button and joystick offer precise control over focusing areas, ensuring your subjects are tack-sharp. Additionally, the white balance/picture style button provides quick access to adjust color tones and image characteristics. Understanding these controls streamlines your workflow, enabling faster responses to dynamic shooting conditions and creative adjustments on the fly.
Rear Panel Controls
The Canon 40D’s rear panel is a hub of functionality, offering comprehensive control over camera settings. The prominent LCD screen displays shooting information and facilitates menu navigation. Surrounding it are buttons for accessing key features like image playback, menu settings, and the ‘Set’ button for confirming selections.
The directional buttons enable swift menu traversal and adjustments. Dedicated buttons for Live View shooting, white balance, and drive modes provide quick access to frequently used settings. The AF point selection/jump button allows for precise focus control. Mastering these controls unlocks the full potential of the 40D, enabling efficient and customized shooting experiences.
Top Panel Controls
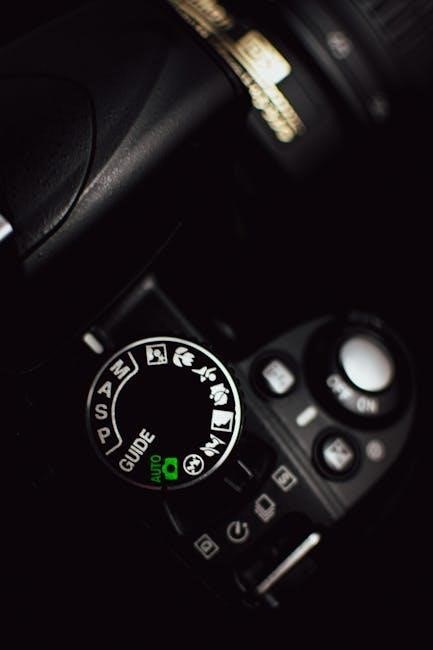
The Canon 40D’s top panel houses essential controls for immediate adjustments during shooting. The main dial selects shooting modes – Auto, Program, Aperture Priority, Shutter Priority, and Manual – offering varying levels of creative control. A dedicated button activates the metering modes, allowing selection of evaluative, partial, or center-weighted averaging.
The shutter button initiates image capture, while the surrounding dial adjusts shooting parameters like aperture or shutter speed, depending on the selected mode. The ISO button provides quick access to sensitivity settings, and the white balance button allows for color temperature adjustments. These controls enable rapid and intuitive operation, crucial for capturing fleeting moments.
Viewfinder and LCD Screen
The Canon 40D features a bright optical viewfinder providing a clear, real-time view of the scene. It offers approximately 96.3% coverage, displaying crucial shooting information like focus points, exposure settings, and white balance. The diopter adjustment accommodates varying eyesight, ensuring sharp focus without glasses.
Complementing the viewfinder is a 3.0-inch LCD screen, ideal for reviewing captured images and navigating menus. Its wide viewing angle and high resolution facilitate accurate composition and detailed image assessment. Live View shooting utilizes the LCD, enabling precise focusing and creative framing, particularly useful in challenging situations.
Shooting Modes and Settings
Explore diverse shooting modes, from fully automatic options for beginners to advanced manual controls, allowing precise customization of aperture, shutter speed, and ISO.
Auto Modes for Beginners
The Canon 40D offers several automatic shooting modes designed for users new to DSLR photography. These modes simplify the process by handling camera settings, allowing you to focus on composition and capturing the moment.
The ‘P’ (Program) mode provides a balance between automatic operation and user control, while the dedicated scene modes – Portrait, Landscape, Close-up, Sports, and Night – optimize settings for specific shooting situations.
These modes automatically adjust aperture and shutter speed to achieve optimal exposure, ensuring well-lit and sharp images. For effortless shooting, simply select the appropriate scene mode and let the camera do the rest, making the 40D incredibly accessible for beginners.
Program Mode (P)
Program Mode (P) on the Canon 40D offers a versatile stepping stone between fully automatic modes and manual control. The camera automatically selects both aperture and shutter speed, but allows you to adjust other settings like ISO, white balance, and exposure compensation.
This mode is ideal for situations where you want a quick and convenient shooting experience without sacrificing complete control. You can shift the program, subtly altering the combination of aperture and shutter speed while maintaining the same exposure.
Program Mode provides a good balance for various shooting scenarios, offering flexibility and creative control for photographers seeking more than just point-and-shoot simplicity.
Aperture Priority Mode (Av)
Aperture Priority (Av) mode on the Canon 40D empowers you to control the depth of field, while the camera automatically sets the shutter speed for proper exposure. This is perfect for portraits, landscapes, or any scene where controlling focus is crucial.
A wider aperture (lower f-number) creates a shallow depth of field, blurring the background and isolating your subject. Conversely, a narrower aperture (higher f-number) increases the depth of field, keeping more of the scene in focus.
Av mode allows creative control over the aesthetic of your images, letting you prioritize depth of field while the camera handles the technical aspects of exposure.
Shutter Priority Mode (Tv)
Shutter Priority (Tv) mode on the Canon 40D grants you control over the shutter speed, dictating how motion is captured, while the camera automatically adjusts the aperture for correct exposure. This mode excels in action photography and creative effects.
Fast shutter speeds freeze motion, ideal for sports or wildlife, while slower shutter speeds blur motion, conveying a sense of movement or creating light trails.
Tv mode is invaluable when you need to precisely control the depiction of motion, allowing you to prioritize capturing a specific moment or artistic effect.
Manual Mode (M)
Manual (M) mode on the Canon 40D provides complete creative control, allowing you to independently set both the aperture and shutter speed. This mode is essential for experienced photographers seeking precise exposure control and artistic vision.
In M mode, you determine the depth of field with aperture and control motion blur with shutter speed, offering unparalleled flexibility.
Mastering Manual mode requires understanding the exposure triangle, but unlocks the full potential of the 40D, enabling you to capture images exactly as you envision them.

Focusing and Metering
Explore the Canon 40D’s autofocus points and metering modes for sharp, well-exposed images; learn techniques like focus lock and recomposition for precision.
Autofocus Modes and Points
The Canon 40D boasts a sophisticated 9-point autofocus system, offering versatile options for various shooting scenarios. Understanding these modes is crucial for capturing sharp images. One-Shot AF is ideal for stationary subjects, locking focus when the shutter button is half-pressed. AI Servo AF continuously tracks moving subjects, maintaining focus as they change position.
AI Focus AF intelligently switches between One-Shot and AI Servo, attempting to determine the subject’s movement. The 40D allows for selecting individual focus points or utilizing all nine. Selecting a specific point provides precise control, while using all points allows the camera to automatically choose the focus area. Mastering these settings ensures consistently sharp results, regardless of the subject or situation.
Metering Modes Explained
The Canon 40D offers three primary metering modes to accurately measure light and determine proper exposure. Evaluative metering, the default, analyzes the entire scene for balanced exposure, suitable for most situations. Partial metering focuses on a smaller area (approximately 6.5% of the frame), ideal when the subject is backlit or has strong contrast.
Center-weighted average metering prioritizes the center of the frame while still considering the surrounding areas. This mode is useful for portraits or subjects positioned centrally. Understanding each mode allows you to tailor exposure to specific scenes, preventing underexposure or overexposure. Experimenting with these settings will significantly improve your image quality and creative control.
Focus Lock and Recomposition
The Canon 40D allows for “focus lock and recomposition,” a technique useful when your desired focal point isn’t directly on an autofocus point. First, aim at your subject and half-press the shutter button to lock focus. While holding the shutter button halfway, gently recompose the shot to your preferred framing.
Be mindful that significant recomposition can slightly alter the focal plane, potentially causing softness. For critical sharpness, use a smaller aperture or consider selecting a more appropriate autofocus point initially. This technique offers creative flexibility, but awareness of its limitations is crucial for consistently sharp images.

Image Quality and Settings

Explore RAW versus JPEG capture, fine-tune white balance for accurate colors, and utilize Picture Styles to customize image tonality on your Canon 40D.
RAW vs. JPEG
Choosing between RAW and JPEG formats significantly impacts your post-processing flexibility. JPEG files are compressed, resulting in smaller file sizes and immediate usability, but with some image data loss. This makes them ideal for quick sharing or when storage space is limited.
RAW files, conversely, contain all the data captured by the sensor, offering maximum editing latitude. You can adjust white balance, exposure, and other settings non-destructively. However, RAW files are considerably larger and require dedicated software for processing.
For serious photographers aiming for the highest quality and control, RAW is the preferred choice. If convenience and smaller file sizes are priorities, JPEG is a suitable option; The Canon 40D allows you to shoot in both formats, or even simultaneously, providing versatility for different shooting scenarios.
White Balance Adjustment
Accurate white balance ensures colors are rendered naturally in your photographs. The Canon 40D offers several white balance presets, including Auto, Daylight, Cloudy, Shade, Tungsten, and Fluorescent, catering to various lighting conditions. Auto White Balance (AWB) is convenient but can sometimes be inaccurate.
For precise control, use Custom White Balance. This involves photographing a white or gray card under the current lighting and telling the camera to use that as a reference. You can also fine-tune white balance using the Kelvin temperature setting, allowing for subtle adjustments.
Incorrect white balance can result in color casts – images appearing too warm (yellowish) or too cool (bluish). Mastering white balance is crucial for achieving realistic and pleasing colors in your photos.
Picture Styles
Canon’s Picture Styles allow you to customize the look of your images directly within the camera. The 40D offers presets like Standard, Portrait, Landscape, Neutral, Faithful, and Monochrome. Each style adjusts sharpness, contrast, color saturation, and tone.
Standard is a versatile all-purpose setting. Portrait emphasizes skin tones, while Landscape boosts blues and greens. Neutral provides a flatter profile ideal for post-processing; Faithful aims for accurate color reproduction.
You can further personalize Picture Styles by adjusting the individual settings within each preset. Creating and saving custom Picture Styles allows you to quickly apply your preferred look to different shooting scenarios, enhancing creative control.

Advanced Features
Explore the Canon 40D’s capabilities with Live View shooting, customizable functions, and precise spot metering for enhanced control and creative possibilities.
Live View Shooting
The Canon 40D’s Live View mode allows you to compose and review images on the LCD screen, offering a different shooting experience than the traditional viewfinder. To activate it, use the Live View button on the rear panel.
This feature is particularly useful for precise composition, macro photography, and shooting from awkward angles. You can select different autofocus modes within Live View, including FlexiZone – Single, FlexiZone – Multi, and Face Detection.
Be mindful of battery consumption as Live View utilizes more power. The camera may also heat up during prolonged Live View use. Experiment with the various settings to find what best suits your shooting style and subject matter.
Custom Functions
The Canon 40D offers a comprehensive set of Custom Functions, allowing you to personalize the camera’s operation to match your shooting preferences. Accessed through the menu, these functions let you modify button assignments, autofocus behavior, exposure settings, and more.
For example, you can assign a specific function to the Set button for quick access, or customize the autofocus point selection method. Exploring these options can significantly streamline your workflow and enhance your shooting efficiency.
Remember to document your custom settings, as reverting to the defaults may be necessary if you encounter unexpected behavior.
Spot Metering
Spot metering on the Canon 40D allows you to precisely measure the light from a very small area of the scene, typically around the active focus point. This is incredibly useful in challenging lighting situations where the camera’s evaluative or partial metering modes might be fooled by bright or dark elements.
To use spot metering, select the appropriate metering mode in the menu and aim the focus point at the specific area you want to expose correctly.
This technique is ideal for backlit subjects or scenes with high contrast, ensuring accurate exposure for your intended subject.
Troubleshooting Common Issues
This section addresses frequent Canon 40D problems like power failures, focusing errors, and error messages, offering solutions for a smooth shooting experience.
Camera Not Turning On
If your Canon 40D fails to power on, begin by verifying the battery is correctly installed and fully charged. Try a different, known-good battery if possible to isolate the issue.
Inspect the battery contacts within the camera and on the battery itself for any signs of corrosion or debris, cleaning them gently if necessary. Ensure the power mode dial is set to a position other than “OFF”.
Occasionally, a depleted or malfunctioning battery can appear full on the charger; testing with a multimeter can confirm its actual voltage. If the problem persists, consider resetting the camera by removing the battery and any memory cards for several minutes before reinserting them.
Focusing Problems
If you’re experiencing focusing issues with your Canon 40D, first ensure you’ve selected an appropriate autofocus (AF) mode for your subject – One-Shot for static subjects, and AI Servo for moving ones. Verify the focus points are correctly positioned over your intended subject within the viewfinder.
Low light conditions can hinder autofocus performance; try using the built-in flash or an external light source. Confirm that the lens is properly mounted and that there isn’t any dirt or obstruction on the lens elements.
Experiment with different AF point selection modes (automatic, spot, or manual selection) to see if it improves focus accuracy.
Error Messages
The Canon 40D displays various error messages indicating potential issues. “Err 00” typically signals a camera malfunction requiring a reset – turn the camera off and on. “Err 99” often relates to a shutter curtain problem, necessitating professional repair.
If you encounter “Card Full” despite space remaining, try reformatting the memory card within the camera. “Card Error” suggests a faulty or incompatible card; test with a different card.
Consult the Canon 40D’s comprehensive manual for a complete list of error codes and their corresponding solutions.

Maintenance and Care
Regular cleaning, proper battery storage, and keeping the firmware updated are crucial for maintaining your Canon 40D’s performance and longevity.
Cleaning the Sensor
Dust on the Canon 40D’s sensor can appear as spots in your images, especially at smaller apertures. Canon recommends using a blower to remove loose particles first. If that’s insufficient, utilize a sensor cleaning kit specifically designed for DSLR cameras.
Always follow the kit’s instructions carefully. Improper cleaning can damage the sensor. Avoid touching the sensor directly with anything other than a designated sensor swab. Consider professional sensor cleaning if you’re uncomfortable performing it yourself, as it requires a delicate touch and the right tools to prevent scratches or further contamination.
Battery Storage
To maximize the lifespan of your Canon 40D’s battery, follow these storage guidelines. When not in use for extended periods, remove the battery from the camera. Store the battery in a cool, dry place, away from direct sunlight and extreme temperatures. Avoid storing a fully discharged battery, as this can cause irreversible damage.
Ideally, store the battery with approximately 40-60% charge. Canon recommends using the original Canon battery charger to ensure proper charging and prevent overcharging. Do not store batteries with metal objects, as this could create a short circuit.
Firmware Updates
Keeping your Canon 40D’s firmware updated is crucial for optimal performance and compatibility. Canon periodically releases firmware updates to address bugs, improve functionality, and add new features. Visit Canon’s official website for your region to check for the latest firmware version available for your camera model.
Download the firmware update and follow the instructions carefully to transfer it to your camera’s memory card. Ensure the camera has sufficient battery power during the update process to prevent interruption; Incorrectly installing firmware can render your camera unusable, so proceed with caution.