voyager 5200 manual
Voyager 5200 Manual: Comprehensive Guide
This comprehensive guide details the Voyager 5200’s setup, features, troubleshooting, and optimization. It covers pairing, software, and maximizing performance for seamless communication.
The Plantronics Voyager 5200 is a premium office Bluetooth headset system designed for desk phone and computer use. This headset offers exceptional audio quality, all-day comfort, and seamless connectivity, enhancing productivity for professionals. It’s part of the Lincoln County SD ecosystem, supporting over 5,200 students, demonstrating reliability.
This manual provides detailed instructions for unboxing, setup, operation, and troubleshooting. Whether connecting via Bluetooth or USB, users will find clear guidance. The Voyager 5200 integrates with voice assistants and benefits from firmware updates via Plantronics Hub. Waldport High School utilizes similar technology, emphasizing the importance of clear communication.
Unboxing and Component Overview
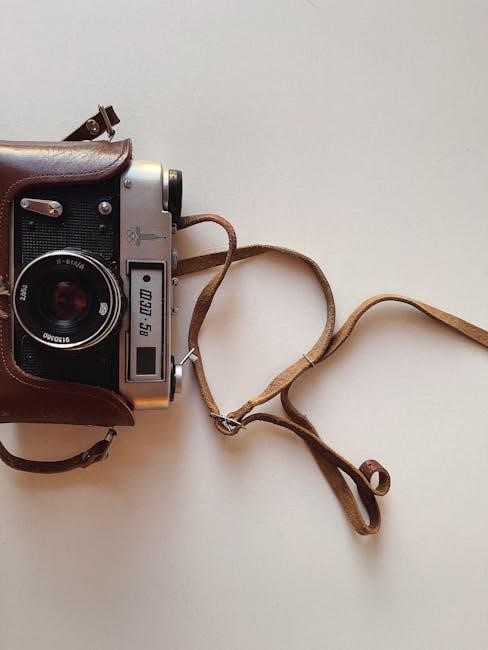
Upon opening the Voyager 5200 package, you should find the headset itself, a USB charging cable, a desk phone base, and quick start guide. Carefully inspect all components for any damage during shipping. The desk phone base facilitates seamless call control and provides a convenient charging location.
The headset features adjustable headband and microphone boom for personalized comfort. Familiarize yourself with the location of the call control buttons – volume, mute, and answer/end call. Like the resources available at Waldport High School, this guide aims for clarity. Ensure all listed items are present before proceeding with setup, referencing the included documentation;

Setting Up Your Voyager 5200
Proper setup involves charging, pairing with your desk phone and computer via Bluetooth, and installing the Plantronics Hub software for optimal functionality.
Charging the Headset
Before initial use, fully charge your Voyager 5200 headset. Connect the provided USB cable to the headset’s charging port and a powered USB source. A solid LED indicator typically signifies charging, while a changing color or turning off indicates a full charge.
Charging time may vary, but generally takes around 2-3 hours for a complete charge. While charging, the headset can still be used, though the battery will not replenish during calls. It’s recommended to charge the headset overnight periodically to maintain optimal battery health. Avoid extreme temperatures during charging, as this can impact battery lifespan.
The Plantronics Hub software can also display the current battery level of your Voyager 5200, providing a convenient way to monitor its charge status.
Pairing with Desk Phone
To connect your Voyager 5200 to a desk phone, you’ll need the Plantronics HL10 handset lifter (sold separately). This device automatically answers and ends calls by lifting and lowering the phone’s handset. Connect the HL10 to your desk phone’s handset port.
Ensure the HL10 is properly configured for your specific phone model – refer to the HL10’s manual for detailed instructions. Once connected, the Voyager 5200 will automatically pair with the HL10, allowing you to control calls remotely. The headset will then seamlessly integrate with your desk phone system, providing hands-free communication.
Troubleshooting may involve checking HL10 compatibility and ensuring correct cable connections.
Pairing with Computer via Bluetooth
To pair your Voyager 5200 with a computer via Bluetooth, first, ensure Bluetooth is enabled on your computer. Put the headset into pairing mode by pressing and holding the multifunction button until the LED flashes. On your computer, navigate to the Bluetooth settings and search for available devices.
Select “Voyager 5200” from the list of discovered devices. You may be prompted for a pairing code; if so, enter “0000”. Once successfully paired, the headset will connect automatically in the future. For optimal performance, install the Plantronics Hub software for enhanced features and firmware updates.
Troubleshooting involves verifying Bluetooth functionality and re-initiating the pairing process.
Plantronics Hub Software Installation
The Plantronics Hub software enhances your Voyager 5200 experience, providing firmware updates, customization options, and device management. Download the software from the Poly (Plantronics) website – ensure you select the version compatible with your operating system (Windows or macOS).
Run the downloaded installer and follow the on-screen instructions. The software will guide you through the installation process, potentially requiring administrator privileges. Once installed, launch Plantronics Hub and connect your headset via USB or Bluetooth.
The Hub will automatically detect your Voyager 5200, allowing you to update firmware and customize settings. Access Help & Support within the Hub for recovery options.

Understanding Headset Features
Explore the Voyager 5200’s intuitive controls: microphone boom, volume, mute, and call buttons. Master these features for optimal call clarity and seamless operation.
Microphone Boom Adjustment
Proper microphone boom positioning is crucial for optimal call quality with your Voyager 5200. The boom should be adjusted so the microphone sits approximately one finger-width away from the corner of your mouth. This ensures clear voice transmission and minimizes background noise pickup.
The flexible boom allows for personalized placement, accommodating various face shapes and sizes. Gently bend the boom to achieve the ideal position. Avoid bending it excessively, as this could damage the internal wiring. Ensure the microphone isn’t obstructed by glasses or clothing.
For consistent audio quality, maintain the same boom position during each call. Experiment to find what works best for your voice and environment. A properly adjusted microphone significantly enhances the clarity of your communication.
Volume Control
The Voyager 5200 offers intuitive volume control for a personalized listening experience. Volume adjustment is easily managed via dedicated buttons located on the earcup of the headset. Press the volume up (+) button to increase the audio level, and the volume down (-) button to decrease it.
These buttons provide incremental adjustments, allowing you to fine-tune the volume to your preferred level. The headset remembers your last volume setting, so you won’t need to readjust it each time you connect.
Additionally, volume control can sometimes be managed through the connected device (computer or desk phone). Experiment with both methods to find what suits your needs best. Maintaining a comfortable volume protects your hearing.
Mute Functionality
The Voyager 5200 features a convenient mute function for privacy during calls. A dedicated mute button, prominently located on the earcup, allows you to instantly silence the microphone. When muted, an audible tone will confirm the status, ensuring you’re aware your voice isn’t being transmitted.
The mute indicator light also provides visual confirmation. Pressing the mute button again reactivates the microphone. During a conversation, quickly silencing yourself is crucial for confidential discussions.
Remember to unmute before resuming participation. The system provides clear alerts for this function. This feature is essential for professional communication and maintaining call control.
Call Control Buttons
The Voyager 5200 offers intuitive call control buttons for seamless management of your conversations. These buttons, conveniently positioned on the earcup, allow you to answer, end, and adjust call volume with ease. A dedicated multifunction button handles call answering/ending and voice assistant activation.
Volume controls, typically plus and minus buttons, adjust the audio level to your preference. These controls work across both Bluetooth and desk phone connections. Quick access to these functions ensures a smooth and efficient call experience.
Familiarize yourself with the button layout for optimal usability and control during important calls.

Advanced Features & Functionality
Explore multi-device connectivity, voice assistant integration, and firmware updates for enhanced performance. The Voyager 5200 offers a streamlined, connected user experience.
Multi-Device Connectivity
The Voyager 5200 excels in seamlessly connecting to multiple devices simultaneously. This allows you to effortlessly switch between your desk phone and computer, ensuring you never miss an important call or notification. Pairing with both devices is straightforward through Bluetooth, offering a unified communication experience.
Plantronics Hub software facilitates managing these connections, providing control over audio routing and device prioritization. You can easily select which device’s audio you want to hear, and which device’s microphone is active. This flexibility is ideal for professionals who juggle calls from various sources throughout the day, maximizing productivity and convenience. The headset remembers paired devices for quick reconnection.
Voice Assistant Integration
The Voyager 5200 offers convenient integration with popular voice assistants like Siri and Google Assistant. Accessing these assistants is typically done through a dedicated button on the headset, or by a specific gesture. This hands-free control allows you to make calls, send messages, set reminders, and access information without needing to reach for your smartphone.
The specific activation method may vary depending on your device and operating system. Refer to your smartphone’s documentation for detailed instructions on enabling voice assistant access with Bluetooth headsets. Ensure your voice assistant is properly configured on your paired device for optimal functionality. Enjoy a streamlined workflow with voice commands!
Firmware Updates & Recovery
Maintaining up-to-date firmware is crucial for optimal Voyager 5200 performance and access to the latest features. Utilize the Plantronics Hub software to check for and install available updates. The software guides you through a simple process, ensuring a smooth upgrade.
In the event of a firmware issue, the Plantronics Hub also provides a recovery option. Connect your headset via USB, navigate to the “Firmware Updates & Recovery” section within the Hub, and enter your Product ID (PID) to initiate the process. This restores the headset to its factory settings, resolving potential software conflicts and ensuring reliable operation.

Troubleshooting Common Issues
This section addresses frequent problems like audio disruptions, connection failures, microphone malfunctions, and charging difficulties with your Voyager 5200 headset.
Audio Problems
Experiencing audio issues with your Voyager 5200? First, ensure the headset volume is appropriately adjusted, both on the device itself and within your connected computer or desk phone settings. Check the audio input/output selections within your system’s sound control panel, confirming the Voyager 5200 is designated as the default device.
If sound remains distorted or absent, try re-pairing the headset via Bluetooth or USB. A firmware update, accessible through Plantronics Hub, can often resolve software-related audio glitches. Inspect the headset’s physical connections – ensure cables are securely plugged in if using a wired connection. Finally, test with a different audio source to isolate whether the problem lies with the headset or the originating device.
Bluetooth Connection Issues
Encountering difficulties pairing or maintaining a Bluetooth connection with your Voyager 5200? Begin by verifying Bluetooth is enabled on both the headset and your intended device; Ensure the headset isn’t already connected to another device, as simultaneous connections can cause conflicts. Attempt to “forget” or remove the Voyager 5200 from your device’s Bluetooth list, then re-initiate the pairing process.
Proximity matters; keep the headset within the recommended Bluetooth range. Interference from other wireless devices can also disrupt connectivity. If problems persist, a Plantronics Hub firmware update might resolve compatibility issues. Restarting both the headset and the connecting device is a simple, yet effective troubleshooting step.
Microphone Not Working
If your Voyager 5200’s microphone isn’t transmitting audio, several factors could be at play. First, confirm the microphone boom is correctly positioned and not muted – a visual check is essential. Verify the headset is selected as the default microphone device within your computer’s sound settings or desk phone system configuration.
Check for any physical obstructions blocking the microphone port. Software conflicts can also cause issues; ensure Plantronics Hub is properly installed and updated. A restart of your computer or desk phone can often resolve temporary glitches. If the problem continues, explore firmware updates via Plantronics Hub for potential fixes.
Headset Not Charging
If your Voyager 5200 isn’t charging, begin by inspecting the charging cable and port for any visible damage or debris. Ensure the cable is securely connected to both the headset and a functioning power source. Try a different USB port or wall adapter to rule out power supply issues.
Allow ample charging time; a full charge can take several hours. If the headset still doesn’t charge, attempt a factory reset (consult the Plantronics Hub software). Check for firmware updates, as these sometimes address charging-related bugs. Contact Plantronics support if the issue persists, as it may indicate a hardware malfunction.

Optimizing Performance & Maintenance
Regular cleaning, maximizing battery life through Plantronics Hub settings, and keeping firmware updated will ensure peak Voyager 5200 performance and longevity.
Cleaning and Care
Maintaining your Voyager 5200 headset involves regular cleaning to ensure optimal hygiene and performance. Use a soft, slightly damp cloth to wipe down the earcups and headband. Avoid abrasive cleaners or solvents, as these can damage the materials. Pay particular attention to areas that come into direct contact with skin, as these can accumulate oils and debris.
For the microphone boom, gently wipe it with a clean, dry cloth. Ensure no moisture enters the microphone port. Regularly inspect the charging port for any lint or debris and carefully remove it. Proper cleaning not only extends the lifespan of your headset but also contributes to a more comfortable and sanitary user experience. Consistent care will keep your Voyager 5200 in excellent condition.
Battery Life Maximization
To maximize the battery life of your Voyager 5200, several strategies can be employed. Avoid exposing the headset to extreme temperatures, as this can degrade battery performance. When not in use, store the headset in a cool, dry place. Utilize the Plantronics Hub software to monitor battery levels and adjust power-saving settings.
Reducing the volume can also contribute to extended battery life. Consider disabling features like voice assistant integration when not actively needed. Fully charging the headset before initial use and avoiding complete discharge cycles can help maintain long-term battery health. Following these tips will ensure your Voyager 5200 remains powered for longer durations.
Plantronics Hub Settings Customization
The Plantronics Hub software offers extensive customization options for your Voyager 5200. Within the application, you can adjust audio settings, including equalization and sidetone levels, to personalize your listening experience. Configure call notification preferences and choose preferred language settings. Explore firmware update options within the “Help & Support” section to ensure optimal headset performance.
Customize button assignments to suit your workflow and manage connected devices efficiently. The Hub also allows for remote headset management and access to detailed usage statistics. Regularly reviewing and adjusting these settings will optimize your Voyager 5200 for your specific needs.

Safety Information & Compliance
Adhere to all regulatory compliance standards and warranty guidelines. Follow provided instructions for safe operation and device handling to prevent damage or injury.
Regulatory Compliance
The Voyager 5200 adheres to various regional and international regulatory standards ensuring safe and reliable operation. This includes compliance with FCC regulations in the United States, as well as CE marking for the European Economic Area, demonstrating conformity with health, safety, and environmental protection standards.
Furthermore, the device meets industry-specific standards for Bluetooth connectivity and wireless communication. Users should consult the full compliance documentation, often available on the Plantronics (now Poly) website, for detailed information regarding specific certifications and applicable regulations in their region. Proper disposal of the headset and its components is also crucial, following local e-waste guidelines to minimize environmental impact.
Warranty Information
Poly (formerly Plantronics) provides a limited warranty for the Voyager 5200 headset, protecting against defects in materials and workmanship. The standard warranty period typically covers one year from the date of original purchase, though this may vary depending on the region and reseller.
This warranty covers repair or replacement of the defective product at Poly’s discretion. It does not cover damage resulting from misuse, accidents, or unauthorized modifications. To initiate a warranty claim, customers should contact Poly support with proof of purchase. Extended warranty options may also be available for purchase, offering additional peace of mind and coverage beyond the standard period.

Technical Specifications
The Voyager 5200 boasts Bluetooth 5.0, offering up to 30 hours talk time and 40 hours standby. It supports common audio profiles for versatile connectivity.
Bluetooth Version
The Plantronics Voyager 5200 utilizes Bluetooth version 5.0 technology. This represents a significant advancement over previous Bluetooth iterations, providing a more stable and reliable wireless connection. Bluetooth 5.0 offers increased speed, extended range, and improved broadcasting capabilities compared to older versions.
Specifically, it delivers up to twice the speed and four times the range of Bluetooth 4.2. This translates to fewer dropped calls, clearer audio, and a more seamless user experience. The enhanced broadcasting capabilities also contribute to improved connectivity with multiple devices simultaneously. Compatibility extends to a wide range of Bluetooth-enabled devices, including smartphones, tablets, and computers, ensuring broad usability.
Talk Time & Standby Time
The Voyager 5200 boasts impressive talk and standby times, ensuring all-day connectivity. Users can expect up to 30 hours of talk time on a full charge, facilitating extended conversations and uninterrupted productivity. Standby time reaches an impressive 40 hours, allowing the headset to remain connected and ready for use even during periods of inactivity.
These figures are estimates and can vary based on usage patterns, Bluetooth connection strength, and audio volume levels. Utilizing the included charging base quickly replenishes the battery, minimizing downtime. Optimizing power consumption through Plantronics Hub settings can further extend both talk and standby durations.
Supported Audio Profiles
The Voyager 5200 supports a wide range of Bluetooth audio profiles for versatile connectivity and high-quality sound. Key profiles include A2DP (Advanced Audio Distribution Profile) for stereo audio streaming, AVRCP (Audio/Video Remote Control Profile) enabling control of music playback, and HFP (Hands-Free Profile) facilitating call management.
Additionally, it supports HSP (Headset Profile) for basic headset functionality. These profiles ensure compatibility with various devices, including smartphones, tablets, and computers. The headset’s optimized audio codecs deliver clear voice transmission and rich multimedia experiences, enhancing both call quality and entertainment.