
handheld singer sewing machine manual
Handheld Singer Sewing Machine Manual: A Comprehensive Guide
SINGER offers diverse machines, from antique to heavy-duty, catering to all skill levels with powerful features. This guide assists in understanding your machine’s value and operation.
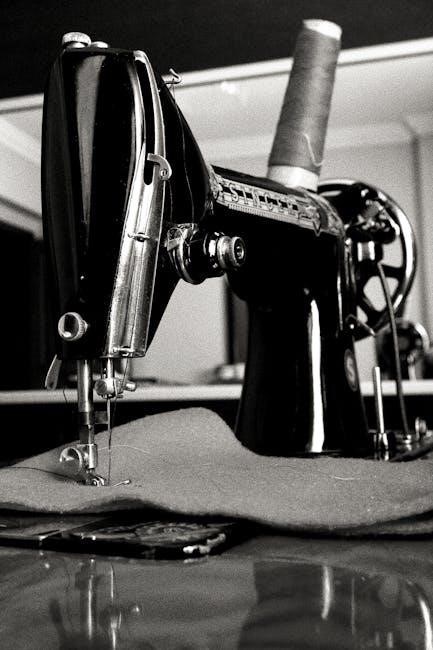
Singer sewing machines have a rich history, evolving from intricate antique models to the robust, modern handheld versions available today. These compact machines represent a significant advancement, offering portability and convenience without sacrificing the renowned Singer quality. They are designed for a wide range of users, from beginners taking their first stitches to experienced sewists needing a versatile, on-the-go solution.
Handheld Singer machines are particularly appealing due to their ease of use and space-saving design. Unlike traditional sewing machines, they don’t require a dedicated sewing room; they can be easily stored and transported, making them ideal for small apartments, travel, or quick repairs. The official Singer website showcases a variety of models, including heavy-duty options capable of handling denim and other thicker fabrics, alongside more delicate machines suited for finer materials.
This comprehensive guide aims to demystify the world of handheld Singer sewing machines, providing detailed instructions and troubleshooting tips to ensure a seamless sewing experience. Whether you’ve just purchased a new machine or are rediscovering an older model, this manual will equip you with the knowledge to unlock its full potential.
Understanding Different Handheld Singer Models
Singer offers a diverse range of handheld sewing machines, each designed with specific features to cater to varying sewing needs. The SINGER Heavy Duty 4452, while not strictly handheld, exemplifies the brand’s commitment to power and durability, boasting 32 built-in stitches and a metal frame. However, the handheld line focuses on portability and simplicity.
Models vary in stitch selection, with some offering basic straight and zigzag stitches, while others include decorative options. Power sources also differ; some operate on batteries, providing true portability, while others require an AC adapter. Understanding these distinctions is crucial when selecting a machine.
The SINGER SE9180, a sewing and embroidery machine, showcases the brand’s advanced capabilities, featuring a touchscreen and automatic needle threader. Though larger, it demonstrates Singer’s technological innovation. When researching, consider the types of projects you’ll undertake – simple repairs, garment construction, or intricate embroidery – to determine the most suitable handheld Singer model. Exploring the official Singer website and current deals can reveal available options and pricing.
Key Features of Handheld Singer Sewing Machines
Handheld Singer sewing machines prioritize portability and ease of use, making them ideal for quick repairs and on-the-go projects. A defining feature is their compact size and lightweight design, allowing for convenient storage and transport. Many models operate on battery power, eliminating the need for a power outlet – a significant advantage for travel or outdoor use.
Despite their small size, these machines often include a selection of essential stitches, typically including straight, zigzag, and sometimes buttonhole options. While not as extensive as larger models like the SINGER Heavy Duty 4452 with its 32 stitches, they cover fundamental sewing needs.

Ease of threading and bobbin winding are also key features, designed for beginner-friendliness. Some models incorporate simple threading guides and transparent bobbin cases for visual clarity. Though lacking the advanced features of machines like the SE9180, Singer handhelds deliver reliable performance for basic sewing tasks, offering a practical solution for everyday mending and crafting.
Setting Up Your Handheld Singer Machine
Before commencing any sewing project, proper setup is crucial for optimal performance. Begin by selecting a stable, flat surface to position your Singer handheld machine. Ensure adequate lighting to clearly view the threading path and sewing area. Insert the appropriate batteries, observing correct polarity, or connect the power adapter if your model supports it.
Next, attach the presser foot securely. Most models feature a simple snap-on mechanism. Confirm it’s firmly locked in place before proceeding. Familiarize yourself with the machine’s controls – the power switch, stitch selector (if applicable), and tension dial. Refer to your machine’s specific manual for detailed illustrations.
Prepare your workspace by having readily available essential accessories like spare needles, bobbins, and a small screwdriver. A well-organized setup streamlines the sewing process. Remember, Singer emphasizes user-friendliness, so initial setup should be straightforward, allowing you to quickly begin enjoying your sewing experience.
Threading the Handheld Singer Machine
Correct threading is paramount for smooth and consistent stitching. Begin by ensuring the machine is switched off. Locate the spool pin and place your thread spool onto it, securing it with a spool cap if provided. Guide the thread through the first thread guide, typically a small metal loop or hook.
Next, follow the threading path indicated in your machine’s manual – this often involves navigating through tension discs and additional guides. Pay close attention to ensure the thread is properly seated in each component. Proceed to thread the needle from front to back (or as specified in your manual).
Finally, draw a sufficient length of thread through the needle eye, approximately 3-4 inches. Singer machines are designed for relatively simple threading, but precise adherence to the manual’s diagram is vital. Incorrect threading can lead to skipped stitches or thread breakage, hindering your sewing project.
Winding the Bobbin for Handheld Models
Properly wound bobbins are crucial for consistent stitch quality. Begin by placing a spool of thread on the spool pin, securing it with a cap. Next, guide the thread through the designated thread guides leading to the bobbin winder. Attach an empty bobbin to the bobbin winder spindle, ensuring it clicks into place securely.
Engage the bobbin winder by pushing it to the right (or as indicated in your manual). Hold the thread tail firmly for the first few rotations to prevent slipping. Gently press the foot pedal to start the winding process. Most Singer handheld models will automatically stop when the bobbin is full.
Once full, disengage the bobbin winder and trim the thread. Insert the wound bobbin into the bobbin case, following the diagram in your manual for correct orientation. Consistent bobbin winding ensures even tension and prevents issues like looping or puckering during sewing.

Basic Stitch Selection and Adjustment
Singer handheld machines offer a variety of built-in stitches, catering to diverse sewing needs; To select a stitch, locate the stitch selection dial – typically featuring numbered or pictorial representations of available stitches. Rotate the dial to the desired stitch number or symbol. Common stitches include straight stitch, zigzag stitch, and often a few decorative options.
Understanding stitch purpose is key. Straight stitches are ideal for seams and general construction, while zigzag stitches provide stretch and are suitable for finishing raw edges. Refer to your machine’s manual for detailed descriptions of each stitch’s intended use.
Adjustment knobs control stitch length and width. Experiment with these settings on scrap fabric to achieve the desired look and functionality. Shorter stitch lengths are stronger, while longer lengths are faster but less durable. Wider zigzag stitches offer more stretch and coverage.
Adjusting Stitch Length and Width
Precise stitch control is crucial for quality sewing. Your handheld Singer machine features dedicated dials or selectors for adjusting both stitch length and width. The stitch length dial, often marked with measurements in millimeters, determines the distance between each stitch. Shorter stitch lengths (e.g., 2.0mm) are ideal for delicate fabrics and reinforcing stress points, creating a denser, stronger seam.
Longer stitch lengths (e.g., 4.0mm) are suitable for basting or gathering fabric, offering more flexibility. The stitch width dial controls the side-to-side deviation of stitches, primarily affecting zigzag stitches. A narrower width creates a tighter zigzag, while a wider width provides more stretch and coverage.
Always test adjustments on scrap fabric matching your project material. Observe how different settings impact the fabric’s appearance and durability. Incorrect settings can lead to puckering, skipped stitches, or weakened seams.
Using Different Presser Feet
Expanding your Singer’s capabilities relies heavily on utilizing the correct presser foot. Standard zigzag feet handle most everyday sewing tasks, but specialized feet unlock advanced techniques. A satin stitch foot, with a larger needle hole, is essential for decorative stitches and smooth satin finishes. For buttonholes, a buttonhole foot guides fabric for consistent, professional results.
A zipper foot allows precise stitching close to zipper teeth, preventing damage and ensuring even alignment. When working with delicate or stretchy fabrics, a walking foot evenly feeds material, preventing puckering and stretching. Clear plastic feet are ideal for appliqué and free-motion quilting, offering visibility.
Changing feet is usually straightforward – release the retaining screw and snap the new foot into place. Always consult your machine’s manual for specific instructions. Using the appropriate foot dramatically improves stitch quality and project outcomes.
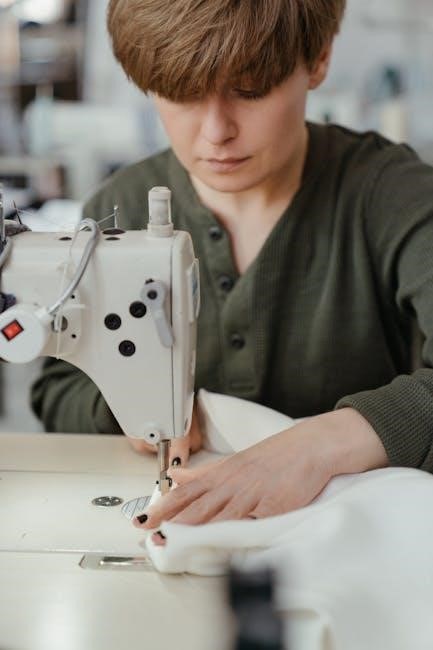
Handheld Singer Machine Operation: Step-by-Step
Begin by ensuring your machine is correctly threaded and bobbin is wound, as detailed in previous sections. Select your desired stitch using the stitch selection dial, and adjust stitch length and width according to your fabric and project needs. Place your fabric under the presser foot, lowering it gently to secure the material.
Hold the fabric lightly, guiding it as you operate the machine. Use a consistent, moderate speed, allowing the machine to feed the fabric. Avoid pulling or pushing, as this can distort the stitches. For turning corners, stop with the needle down, lift the presser foot, pivot the fabric, and continue sewing.
Remember to backstitch at the beginning and end of each seam to secure the stitches. Regularly check your work for any issues, such as skipped stitches or tension problems. Practice on scrap fabric before starting your project to familiarize yourself with the machine’s operation.
Troubleshooting Common Issues
Encountering problems with your handheld Singer machine is common. If the machine isn’t sewing, re-check threading, ensuring it’s correctly routed through all guides and the needle. A properly wound bobbin is crucial; rewind if necessary. Skipped stitches often indicate a bent or dull needle – replace it immediately.
Thread breakage frequently stems from incorrect tension. Adjust the tension dial incrementally, testing after each adjustment. Ensure you’re using the correct thread type for your fabric. Motor concerns, though less frequent in handhelds, might suggest a power supply issue; verify the connection.
If issues persist, consult the full manual or online resources. SINGER’s website provides support and troubleshooting guides. Remember, regular cleaning and lubrication, as outlined in the maintenance section, can prevent many problems. Don’t attempt repairs beyond your skill level.
Needle Problems and Solutions

A frequent issue with handheld Singer machines is needle-related. Bent or broken needles cause skipped stitches, uneven seams, and potential damage to the fabric. Always replace a bent or damaged needle immediately – using a new one is paramount for quality sewing.
Ensure you’re using the correct needle type and size for your fabric weight. Lightweight fabrics require finer needles (size 60/8 to 80/12), while heavier materials like denim demand larger needles (size 90/14 to 110/18). Incorrect needle size can lead to thread breakage or fabric puckering.
Proper needle insertion is vital. The flat side of the needle should face the back of the machine. If the needle isn’t fully inserted, it can cause issues. Regularly inspect the needle for burrs or damage. A dull needle increases friction and can contribute to thread breakage and skipped stitches.
Thread Breakage and Tension Issues
Thread breakage is a common frustration with handheld Singer machines, often linked to improper tension. Incorrect tension causes loops, puckering, or thread snapping. Begin by re-threading the machine, ensuring the thread is properly seated in the tension discs. A poorly threaded machine won’t maintain consistent tension.
Adjust the tension dial incrementally. Higher numbers increase tension, while lower numbers decrease it. Test the tension on a scrap fabric sample. Ideal tension creates balanced stitches with no loops on either side. Different thread types also require different tension settings; heavier threads generally need looser tension.
Ensure the bobbin is wound evenly and correctly. An unevenly wound bobbin can cause inconsistent tension. Also, verify you’re using a thread quality compatible with your machine and fabric. Cheap or old thread is prone to breaking. Regularly clean the tension discs to remove lint and debris that can interfere with smooth thread flow.
Motor and Power Supply Concerns
Handheld Singer machines, while convenient, can experience motor and power supply issues. If the machine runs erratically or stops unexpectedly, first check the power source. Ensure the batteries are fresh and correctly installed, or that the AC adapter is securely plugged into both the machine and a functioning outlet.
Overloading the machine with thick or multiple layers of fabric can strain the motor, causing it to slow down or stall. Reduce the fabric thickness or sew slower. A clogged or poorly lubricated motor can also lead to performance issues. Refer to the maintenance section for cleaning and lubrication instructions.
If the motor makes unusual noises, such as grinding or squealing, it may indicate a mechanical problem requiring professional repair. Do not attempt to disassemble the motor yourself. Always disconnect the power source before inspecting or cleaning the machine. Singer does not guarantee results from third-party repairs.
Maintaining Your Handheld Singer Machine
Regular maintenance is crucial for the longevity and optimal performance of your handheld Singer sewing machine. Consistent cleaning prevents lint and debris buildup, which can cause jams and affect stitch quality. After each use, brush away lint from the bobbin area and feed dogs using the provided brush.
Lubrication is equally important. Apply a drop of sewing machine oil to the motor and other moving parts as indicated in the manual. Avoid over-oiling, as this can attract more dust. Inspect the power cord and plug for any signs of damage. A damaged cord poses a safety hazard and should be replaced.
Singer offers a range of accessories and replacement parts. Regularly check for wear and tear on presser feet and needles, replacing them as needed. Proper storage also contributes to maintenance; keep the machine covered when not in use to protect it from dust and damage.
Cleaning and Lubrication
Consistent cleaning is paramount for a smoothly operating handheld Singer. Lint and thread fragments accumulate, hindering performance and potentially causing malfunctions. After each sewing session, utilize the brush included with your machine to meticulously remove lint from the bobbin case, feed dogs, and surrounding areas. A small vacuum attachment can also be helpful for reaching tight spaces.
Lubrication ensures moving parts function efficiently and reduces friction. Apply a single drop of high-quality sewing machine oil to the motor, gears, and any points specified in your machine’s manual. Avoid over-oiling, as excess oil attracts dust and can create a sticky residue.
Regularly inspect the machine for dust buildup and wipe down the exterior with a soft, dry cloth. Proper cleaning and lubrication extend the life of your Singer and maintain consistent stitch quality, ensuring years of reliable service.
Replacing Parts and Accessories
Over time, components of your handheld Singer may require replacement due to wear and tear. Needles are the most frequently replaced part, and selecting the correct type for your fabric is crucial for optimal performance. Presser feet also wear out or may need changing to accommodate different sewing tasks.
Locating replacement parts is simplified through the official SINGER website and authorized dealers. They offer a comprehensive selection of genuine Singer accessories, including bobbins, needles, presser feet, and even complete motor assemblies. When ordering, always reference your machine’s model number to ensure compatibility.
Singer provides deals on accessory bundles and refurbished machines, offering cost-effective solutions. Carefully follow the instructions in your manual when replacing parts, and if unsure, consult a qualified sewing machine technician. Maintaining a stock of essential accessories ensures uninterrupted sewing enjoyment.
Finding Replacement Parts
Locating genuine replacement parts for your handheld Singer sewing machine is essential for maintaining its performance and longevity. The official SINGER website serves as the primary resource, offering a vast catalog of parts specifically designed for various models. Utilizing your machine’s model number is critical when searching to guarantee compatibility and a proper fit.
Authorized SINGER dealers, both online and brick-and-mortar stores, also stock a wide range of replacement parts and accessories. These dealers can provide expert advice and assistance in identifying the correct components for your needs. Furthermore, SINGER frequently offers deals and discounts on parts, particularly within their dedicated ‘Deals’ section.
When exploring options, be cautious of third-party sellers offering generic parts, as quality and compatibility may vary. Prioritizing genuine SINGER parts ensures optimal functionality and protects your machine’s warranty. Fast, free delivery is often available on most orders from the official website.
Handheld Singer Machine Safety Precautions
Operating a handheld Singer sewing machine requires adherence to crucial safety precautions to prevent injury and ensure the machine’s longevity. Always disconnect the power supply before performing any maintenance, such as changing the needle or threading. Keep fingers and other body parts clear of the needle area during operation – serious injury can occur.
Never force the fabric under the needle; allow the machine to feed the material naturally. Avoid using damaged or dull needles, as they can break and cause harm. Ensure the machine is placed on a stable, level surface during use to prevent it from tipping over. Regularly inspect the power cord for any signs of damage and replace it if necessary.
Keep the machine out of reach of children. Do not attempt to repair the machine yourself if you are not qualified; seek assistance from an authorized SINGER service center. Following these guidelines will contribute to a safe and enjoyable sewing experience.
Advanced Techniques with Handheld Singers
With mastery of basic operation, handheld Singer machines unlock a realm of advanced sewing techniques. Explore free-motion quilting, utilizing a darning foot to create intricate designs and textures on fabric. Experiment with appliqué, precisely positioning fabric shapes onto a base cloth for decorative effects. Mastering these skills requires practice and patience.
Delve into techniques like gathering, creating ruffled effects by adjusting stitch length and tension. Utilize different presser feet – a zipper foot for precise zipper insertion, or a buttonhole foot for professional-looking buttonholes. Consider embroidery, using specialized stabilizers and threads to embellish fabrics with personalized designs.

SINGER machines, even handheld models, can handle diverse projects. Remember to always test stitch settings on scrap fabric before applying them to your final project. Resources and support from SINGER can further enhance your skills and inspire creativity, allowing you to push the boundaries of your sewing capabilities.
Resources and Support for Handheld Singer Users
SINGER provides extensive resources to support users of all levels, from beginners to experienced sewists. The official SINGER website (singer.com) is a central hub for information, offering downloadable manuals, troubleshooting guides, and frequently asked questions. Explore their online help center for solutions to common issues.
SINGER’s website also features a “Deals” section with rotating discounts on machines, accessories, and notions. YouTube channels dedicated to sewing often showcase tutorials specifically for SINGER machines, providing visual guidance on techniques and repairs. Online sewing communities and forums offer a platform to connect with fellow enthusiasts, share tips, and seek advice.
For more personalized assistance, SINGER offers customer support via phone and email. Remember that third-party services may also provide support, but SINGER does not guarantee their accuracy. Utilizing these resources ensures a smooth and enjoyable sewing experience with your handheld Singer machine.